
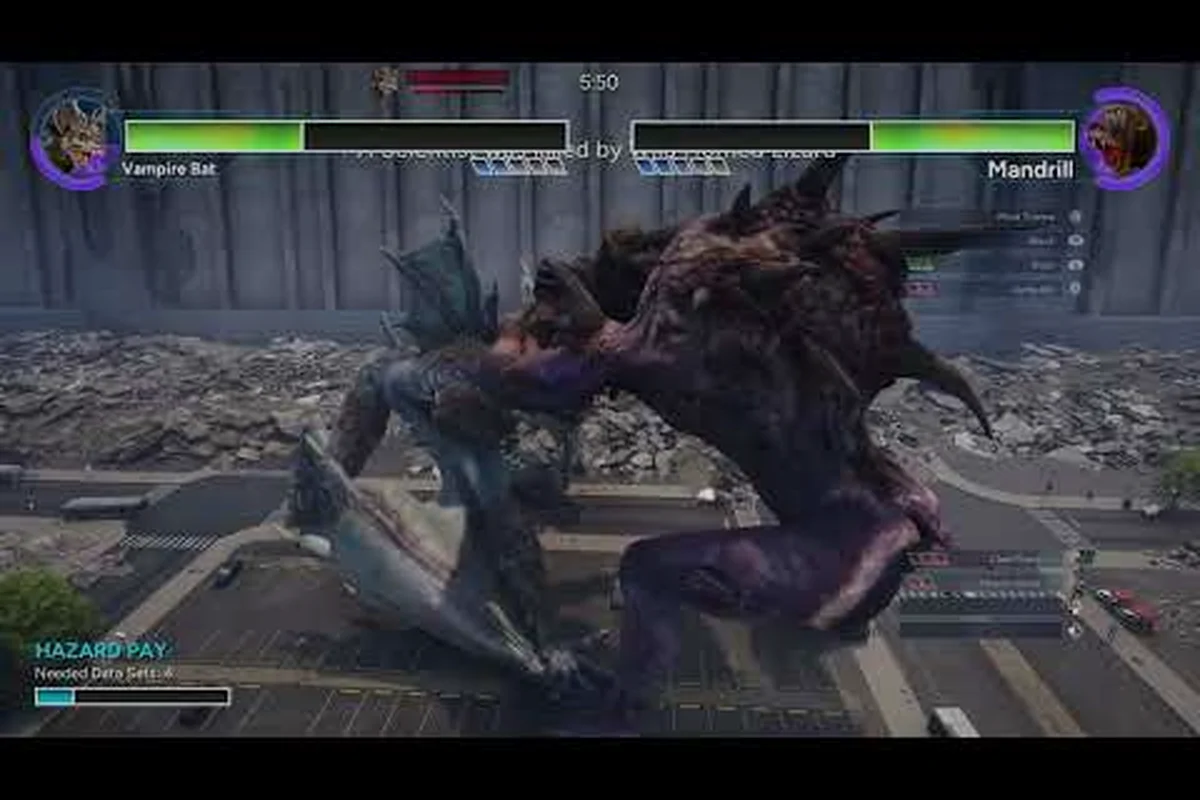
Mastering BeastLink beast combos is the fastest way to go from a walking disaster to a city-leveling legend. While simply Linking with a dormant Kaiju gives you raw power, the real damage comes from weaving abilities together in sequences that multiply their effect. This guide breaks down the ability chain system, team synergy, and the exact rotations that top players use to dominate matches.
The Link system sits at the heart of BeastLink, letting you spend serum to connect with colossal creatures that each carry a unique kit of moves. Because every Beast has its own cooldowns, ranges, and damage profiles, learning how to sequence those abilities is what separates a decent run from a flawless city wipe. We are going to cover solo rotations, coordinated team combos, the best Beast choices for different roles, and the stat lines you should prioritize when building your Link.
Understanding the BeastLink Ability Chain System
Every Beast in BeastLink carries three core ability types: a primary strike, a mobility skill, and an ultimate charge. When you chain these in the correct order, you activate a combo multiplier that boosts damage by up to 40 percent on the third consecutive hit. The catch is that the window between abilities is tight, so you need to read your cooldown timers and position yourself before committing to the sequence.
The game rewards players who build a rhythm around their Beast's kit rather than spamming every button on cooldown. According to the official BeastLink website, the core power fantasy is controlling colossal creatures with unique abilities, and the entire combat loop is designed around making every ability choice matter. That means a poorly timed dash can leave you vulnerable for the two seconds your opponent needs to collapse a building on your position.
Primary Strike Timing
Your primary strike is the bread-and-butter damage tool, but its animation lock is where most players lose their chain. Each Beast has a different wind-up time, ranging from 0.8 seconds on the agile Vexra to nearly 2.2 seconds on the lumbering Titanox. You want to start the primary strike while your target is still stunned from your mobility skill, which gives you the full animation window without eating return fire.
Cooldown Management
Cooldown management is the hidden layer of BeastLink beast combos that most beginners ignore. Your mobility skill typically sits on a 6-8 second cooldown, while the primary strike cycles every 3-4 seconds. The ultimate charge builds from landing hits, so a clean chain will fill your ultimate gauge roughly 25 percent faster than random button mashing. This matters because ultimates are the only way to trigger SuperDestruction, the mechanic that collapses entire city blocks and instantly swings a match.
Solo Combo Rotations for Maximum Damage
When you are running solo against a squad of human players, your job is to apply pressure without overextending. The most reliable rotation right now, based on community testing from the early access build, is the Mobility-Strike-Ultimate loop. You open with a dash or leap to close distance, follow with your primary strike while the enemy is off-balance, and then retreat while your cooldowns recover. This keeps your combo multiplier alive without leaving you exposed for the full enemy reload cycle.
The second rotation that experienced players swear by is the Counter-Engage sequence, which works best against aggressive opponents. You bait their attack, dodge through it using your i-frames, then immediately unload a primary strike into their back. Because the dodge counts as a mobility skill activation, your combo multiplier carries over, so the follow-up strike hits at the boosted damage tier. This is one of those BeastLink beast tips that feels situational but wins duels consistently.
| Combo Rotation | Ability Order | Best Used Against | Difficulty |
|---|---|---|---|
| Mobility-Strike-Ultimate | Dash -> Strike -> Ultimate | Groups of infantry | Beginner |
| Counter-Engage | Dodge -> Strike -> Strike | Aggressive Beasts | Intermediate |
| Building Collapse | Strike -> Slam -> Ultimate | Armored vehicles | Advanced |
The Building Collapse rotation deserves special mention because it exploits the destructible environment. You strike a weakened structure, slam the ground to knock enemies off balance, then detonate your ultimate while they are trapped in the rubble. According to player reports on the BeastLink Steam page, this sequence can clear a full squad camping in a multi-story building in under four seconds.
Team Combos and Synergy Tactics
Coordinated team play is where BeastLink beast combos reach their full potential. When two or three Beasts time their abilities together, the combined damage and crowd control create windows that single players simply cannot replicate. The most common team composition in ranked matches is the Tank-Disruptor-Glass Cannon setup, where one Beast holds attention, one disrupts positioning, and one delivers the killing blow.
The stun-lock combo is the simplest team tactic to execute. One Beast uses a knockdown ability, a second follows with a knockback that pins the target against a structure, and a third lands a fully charged strike. Because each ability extends the stun duration, the enemy team watches their Beast get deleted without ever regaining control. This works especially well against lone Beasts that push too deep into your half of the map.
Tank and Disruptor Pairing
If you are looking for the best beast for beginners in a team context, the tank role is the most forgiving. You absorb damage, hold attention, and set up kills for your teammates without needing perfect combo timing. The disruptor role is trickier because it requires reading the enemy's movement patterns, but the payoff is massive when you land a well-timed knockback that separates their damage dealer from their support.
Building a Combo-Friendly Loadout
Your loadout choices matter almost as much as your ability timing. Certain upgrades reduce cooldowns on specific ability types, which directly affects how often you can start a combo chain. Community reports suggest that prioritizing cooldown reduction on your mobility skill gives you the most flexibility, because it lets you cycle into new combo opportunities more frequently. If you want to see which Beast kits pair well with aggressive playstyles, our best beast for PvP breakdown covers the top picks in detail.
| Team Role | Primary Job | Best Ability Focus | Recommended Beast Type |
|---|---|---|---|
| Tank | Absorb damage, hold attention | Health and armor buffs | Titanox, Gromak |
| Disruptor | Knock enemies out of position | Mobility and knockback | Vexra, Skarith |
| Glass Cannon | Deliver finishing damage | Strike damage multipliers | Pyrax, Drakk |
Rare Beasts and New Additions
The early access roster includes several BeastLink rare beasts that rotate in and out of the available pool. These rare spawns typically have higher base stats or unique ability modifiers that make them worth hunting for. According to the official BeastLink YouTube channel, the developers are actively adding new Beast types with each major update, so the meta shifts more often than in most Kaiju games.
The Pyrax is currently the most sought-after rare Beast because its ultimate applies a burn effect that deals damage over time, which stacks with your combo multiplier for absurd sustained damage. The Skarith is another fan favorite, offering a teleport ability that lets you reposition mid-combo without breaking your chain. Both of these require significant serum investment to unlock, but the payoff is worth it if you are serious about how to master beasts in competitive play.
How to Unlock New Beasts
Unlocking BeastLink new beasts follows a predictable loop. You earn serum by participating in matches, destroying buildings, and completing objectives, then spend that serum at the Link stations scattered across each map. The rare beasts cost significantly more serum than the starter options, so you need to be selective about what you unlock first. A good rule of thumb is to master one mid-tier Beast before grinding for a rare one, because a well-played common Beast beats a poorly played rare Beast every time.
Rare Beast Ability Modifiers
Rare beasts come with a twist: their abilities have modified properties that change how you build combos. The Pyrax's burn effect, for instance, means you want to extend fights rather than burst, because the damage over time keeps ticking while you reposition. The Skarith's teleport lets you chain abilities from unexpected angles, which makes you much harder to pin down. Understanding these modifiers is the difference between treating a rare Beast like a common one and actually unlocking its full potential.
Map Positioning and Environmental Combos
The destructible city maps are not just visual flair; they are a core part of the combo system. Every map has structures that can be collapsed to create barriers, block enemy movement, or trap opponents in confined spaces. Our beginner map guide breaks down the best starting locations, but the key insight for combos is that you should treat buildings as part of your ability kit.
The collapse-and-strike combo works on any map with tall structures. You weaken a building with one or two strikes, wait for an enemy Beast to walk into its shadow, then trigger the collapse with a slam ability. The falling debris stuns the target, which opens a free window for your team to unload a full combo chain. This is one of those BeastLink beast tips that feels cheap when it happens to you but absolutely fair when you pull it off.
Choke Points and Forced Movement
Choke points are where environmental combos shine. When an enemy Beast is forced through a narrow street between two tall buildings, you control their movement options completely. A well-placed knockback pins them against the wall, and then your team collapses both structures on top of them. The damage from the debris is significant, but the real value is the extended stun that lets you land a fully charged ultimate without interruption.
Open-Area Counterplay
Open areas are the counterplay to environmental combos, which is why experienced players push fights toward the map edges. If you are the one getting collapsed on, your priority is breaking line of sight and forcing the enemy to reposition. The Vexra's dash is excellent for this because it gives you a burst of speed that carries you out of the danger zone before the debris lands.
Advanced Combo Timings and Frame Windows
For players who want to push beyond the basics, understanding frame windows is the next level of BeastLink beast combos. Each ability has a brief cancel window where you can transition into another ability without losing your combo multiplier. Hitting these windows consistently requires practice, but the reward is a 15-20 percent damage increase over players who just spam abilities in sequence.
The cancel-and-continue technique works best on Beasts with fast primary strikes. You start the primary strike, cancel it just before the animation completes, and immediately follow with your mobility skill. This keeps the combo multiplier alive while resetting your positioning. According to community testing, this technique is especially effective on the Drakk, whose low-cooldown primary strike lets you chain multiple cancels in a single engagement.
| Advanced Technique | Execution Window | Difficulty | Reward |
|---|---|---|---|
| Cancel-and-Continue | 0.2s before strike lands | High | +15% combo uptime |
| Stagger Reset | After knockdown lands | Medium | Extended stun lock |
| Ultimate Overlap | During ultimate cast | Very High | Double damage window |
The stagger reset is another advanced tool that pairs well with team play. When your knockdown lands, the enemy is briefly vulnerable, but many players waste that window by starting their ultimate immediately. Instead, you use the stagger to reset your primary strike cooldown, land two quick hits, and then follow with the ultimate while the enemy is still recovering. The extended damage window often catches opponents off guard because they expect the ultimate to come first.
Reading Opponent Cooldowns
Advanced play is as much about reading your opponent as it is about executing your own combos. When you see an enemy Beast use its mobility skill, you know it has a 6-8 second window where it cannot escape. That is your cue to commit to a full combo chain. Conversely, if your opponent is holding their mobility skill, they are likely baiting you into overextending, so you should play more conservatively and wait for them to commit first.
Practice Drills for Consistency
Consistency comes from drilling the same combo sequences until they become second nature. The most effective practice method, based on player recommendations, is to run solo matches against AI-controlled enemies and focus on landing the same rotation five times in a row without breaking your combo multiplier. Once you hit that consistency, start mixing in environmental collapses and team coordination to simulate real match conditions.
Frequently Asked Questions
What is the easiest combo for beginners to learn?
The Mobility-Strike-Ultimate loop is the easiest combo to start with because it only requires three abilities in a fixed order. Dash in, land a primary strike, then use your ultimate when the gauge fills. Focus on keeping the combo multiplier alive rather than chasing complex rotations.
How do I unlock rare beasts in BeastLink?
Rare beasts require significantly more serum than starter options, which you earn by participating in matches and destroying buildings. Save your serum for the rare spawns you actually want, and master a mid-tier Beast first so you understand the combat system before committing to a rare unlock.
Can beast combos work in solo play?
Absolutely. Solo beastlink combos rely on self-sufficient rotations—like pairing a low-cooldown striker with a sustain beast—to keep your multiplier alive without a partner. The Counter-Engage sequence shines here, punishing aggressive AI or players while letting you dictate pace. Just time your beast swap to reset cooldowns efficiently.
Which Beast is best for team play?
The tank role is the best starting point for team play because it is the most forgiving. Beasts like Titanox and Gromak absorb damage and set up kills for your teammates, letting you learn combo timing without the pressure of being the primary damage dealer.
Do rare beasts have different combo requirements?
Yes, rare beasts swap standard combos for signature modifiers. Pyrax extends burn stacks with each multiplier hit, while Skarith teleports mid-chain, forcing angle-adjusted follow-ups. Always check the beast’s modifier list before locking in your rotation—what works on a common beast will whiff on a rare.